
Johns Manville Vapor Barrier Installation: The Woodland Hills Owner’s Guide
Johns Manville vapor barrier installation in Woodland Hills typically runs $1.25 to $2.50 per square foot installed, with most single-family attic jobs landing between $850 and $1,900 depending on square footage and access. Our Woodland Hills crews stock Johns Manville-compatible vapor barriers on the truck, so we can usually install same-day or next-day after a quick attic walkthrough. Most homeowners discover a vapor barrier has failed when they notice condensation on attic rafters, a musty smell upstairs, or a humid, heavy feel in rooms directly below the attic floor.
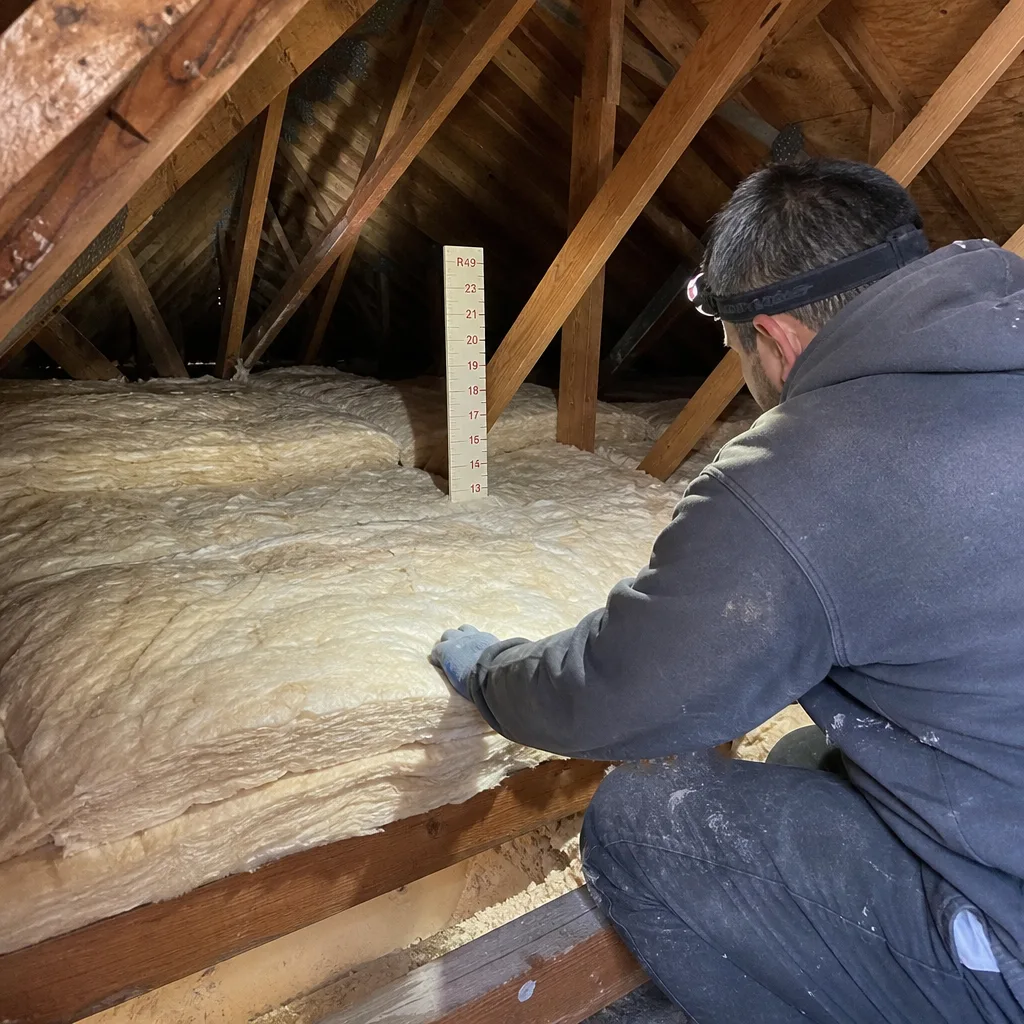
Vapor barriers do a job most people never think about until it stops working. They control where moisture moves in your attic assembly. When the barrier fails or was never installed right in the first place, moisture migrates into your insulation, drops its R-value, and eventually gives you mold, rot, and higher cooling bills. That’s the part of the job nobody sees until it’s already costing them money.
Which Johns Manville Models This Applies To
Johns Manville manufactures vapor barriers primarily as part of their broader insulation system, not as standalone branded products with model numbers like you’d find on a furnace. The vapor barrier we install alongside Johns Manville batt or blown-in insulation is typically a poly film rated at 6 mil or thicker, which is the industry standard for Class I vapor retarders in attics and crawl spaces. Johns Manville’s own installation guides reference a minimum 6 mil polyethylene sheet for ceiling-side vapor control in climate zones where it’s required.
One compatibility gotcha we run into constantly in Woodland Hills: Southern California is in Climate Zone 3, which means vapor barriers generally belong on the warm side of the wall or ceiling assembly – and in many attic configurations, a full Class I vapor barrier can actually trap moisture if paired with the wrong insulation type. Johns Manville fiberglass batts don’t need a vapor barrier facing in our climate, but if you have Johns Manville spray polyurethane foam or closed-cell foam board, the vapor retarder requirements change entirely. Matching the barrier to the insulation system, not just slapping down plastic, is the real difference between a job that works and one that rots from the inside.
We’re an independent insulation contractor in Woodland Hills – we install Johns Manville materials consistently, but we’re not a Johns Manville dealer or affiliate. That independence means we pair the right barrier with the right insulation, not whatever one brand wants to bundle.
Signs Your Johns Manville Vapor Barrier Installation Is Failing
- Condensation on attic sheathing or rafters in the morning. Warm, moist air from the living space is rising through ceiling penetrations and hitting a cold surface. A properly installed barrier slows that migration; a failed one lets it pour through.
- A musty or “old towel” smell upstairs that gets stronger in summer. Moisture is being held in the fiberglass or trapped against wood. Wet insulation loses its R-value fast – fiberglass at 25% moisture content can lose half its thermal performance.
- Drywall stains or peeling paint on ceilings below the attic. This means moisture has been condensing long enough to saturate the ceiling finish. By the time you see the stain, the barrier above it has been compromised for weeks or months.
- Visible gaps, tears, or unsealed seams in the existing plastic sheeting. Every penetration – recessed lights, plumbing chases, electrical boxes – is a leak point. A vapor barrier with unsealed penetrations is doing about half its job.
- Insulation that feels damp or looks compressed in spots. Moisture weighs down fiberglass, and once it compresses, it never springs back. Compressed Johns Manville batts at R-30 often perform closer to R-19 or worse, and no amount of fluffing fixes it.
Chase Whitaker, our owner, has spent more than a decade diagnosing air-sealing gaps across the San Fernando Valley. His take on it: “If your attic is under-insulated, your AC is just paying rent to the outside air.” And if your vapor barrier is shot, that rent goes up every summer.
Replacement Cost & What’s Included
For most Woodland Hills homes in the 1,200 to 2,200 square foot range, a Johns Manville-compatible vapor barrier installation runs $850 to $1,900 installed. That includes removal of the failed barrier, a quick inspection of the insulation underneath for moisture damage, new 6 mil poly film properly lapped and sealed, and sealing around all ceiling penetrations so the barrier actually functions as a system. Attics with tight clearances, low pitches, or extensive existing damage can push toward the higher end or beyond.
You get a written price before any work starts – that’s a non-negotiable for us, part of the Relay Visibility Guarantee. You also get a written guarantee on the work itself, live technician tracking on install day, and before-and-after photos so you can see what was replaced. Our 365-Day Done Right Promise covers workmanship for a full year. If the barrier fails because of something we did, we return and make it right at no charge. Free second visit. No argument.
DIY or Call Us?
What you can safely do: check your existing barrier for visible gaps or damp spots near the attic access hatch, look for dark stains on the underside of the roof sheathing, and note any rooms that feel humid or smell musty. Those observations help us quote accurately over the phone.
What we’d caution against: installing or replacing a vapor barrier yourself. The work requires working in a confined, often hot attic space around electrical wiring, recessed lights, and sometimes vermin droppings. The bigger issue is getting the vapor placement wrong. In Woodland Hills’ climate, putting a Class I barrier on the wrong side of the assembly can actively cause the mold problem you’re trying to prevent. We’ve pulled out plenty of well-intentioned DIY plastic sheeting that was sweating against the drywall because it was installed upside-down for our climate zone. Call (559) 295-5362 and let us put eyes on it first. The estimate is free.
FAQs
A properly installed 6 mil polyethylene vapor barrier in a dry, ventilated attic can last 20 years or more, but in Woodland Hills the bigger risk is installation error – misplaced barriers can fail in as little as two or three summers. Temperature swings between the valley floor and cool ocean air tend to stress seams over time, especially in older Warner Center corridor homes where attics were built with minimal ventilation.
Small tears and unsealed penetrations can often be taped and sealed with proper vapor-rated tape, but if the barrier has been failing for more than a season, the insulation underneath is usually damp or compressed and needs to come out anyway. In that case, repair costs approach replacement costs, and replacement gets you a written guarantee. Call (559) 295-5362 and we’ll tell you honestly which one your attic actually needs.
Most single-family vapor barrier replacements in Woodland Hills take 3 to 6 hours, depending on attic access and how much old material needs to come out. We give you a live arrival window, not a four-hour guess, and you can track the technician the same way you’d track a rideshare.
Yes. We carry 6 mil poly vapor barrier, Johns Manville-compatible tapes and sealants, and if needed, Reflectix radiant barrier material for Woodland Hills attics that need both moisture control and reflected heat. If your job needs something specific, we source it before we arrive, not after we’ve started cutting.
If your attic is showing any of the signs above, call us at (559) 295-5362 for a free estimate. A real person answers, 24/7. We’ll get you a written price and a straight answer before you commit to anything.
Written by Chase Whitaker, Owner, Laurel Attic Insulation Woodland Hills at Laurel Attic Insulation Woodland Hills, serving Woodland Hills and nearby areas.